5/17/20 Transplanting Peppers and Tomatoes: Technique

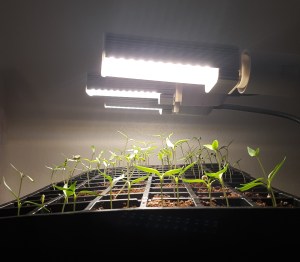
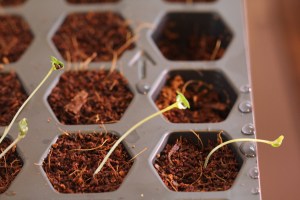
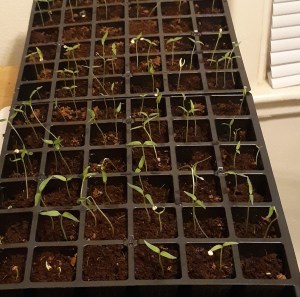
The tomatoes and peppers that I planted into 72 cell seed trays and well on their way! I actually did the transplanting at the end of March for the peppers and the Middle of April for the tomatoes. This post will be a look back at how I did it.

Step One: Choose a container

Holes for drainage
Holes for drainage

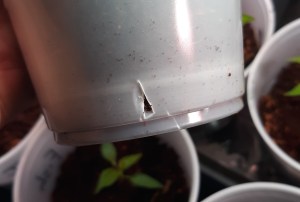
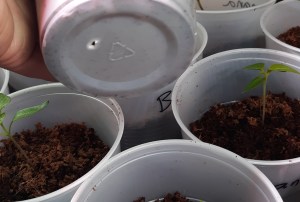
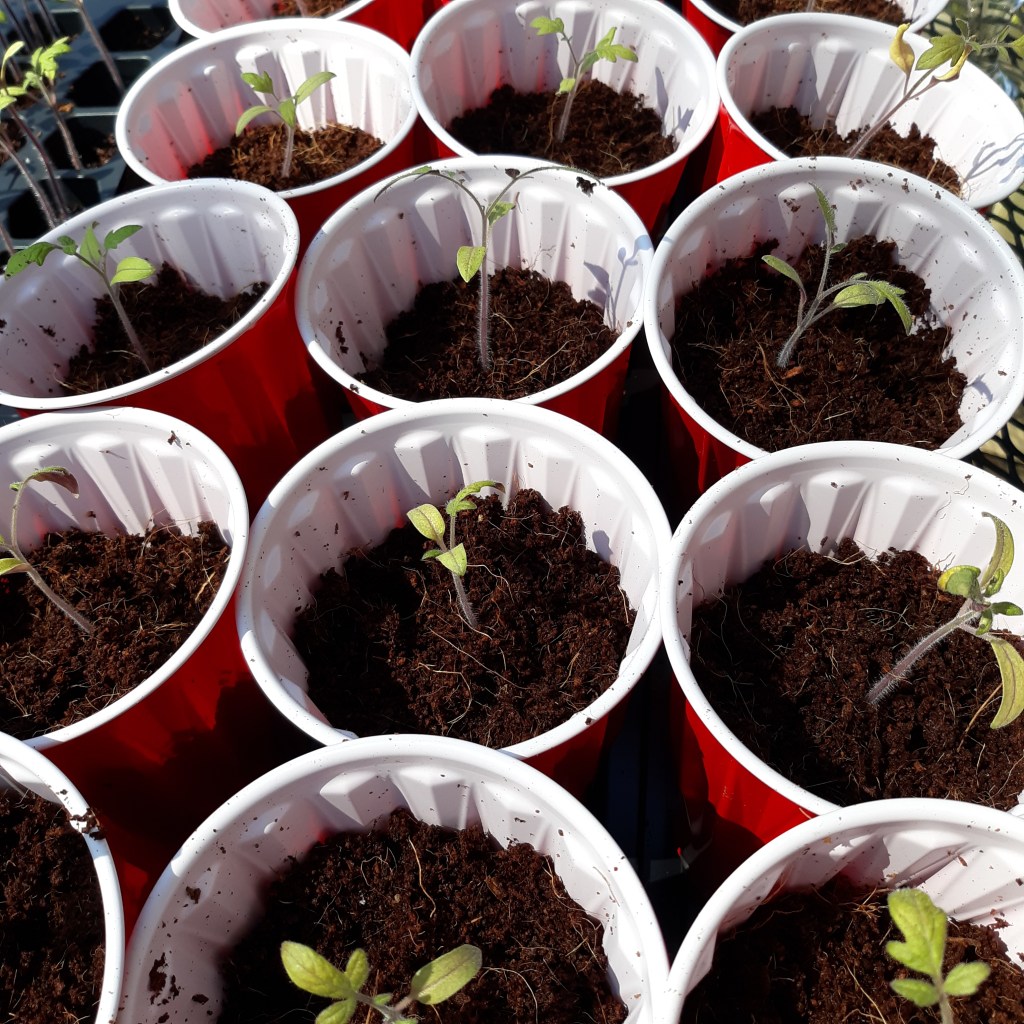
I just used some plain plastic cups because they are cheap and I can get a lot in a package. Gardening stores will have circular or square potting cups you can buy too. Those should already have holes in them. I just poked crude holes in these with some scissors. Some people just save grocery store containers that their food comes in such as yogurt or cottage cheese. I don’t prefer that because I wanted them to be uniform size to fit in the trays better. I also liked the cup idea because then I can write on the cup and not worry about having tags to label the variety on. The container you choose is all about preference. But, one mandatory feature is that they must have holes in the bottom. You should take care not to over water your plants for a variety of reasons. However, it is a good idea to have this fail safe built in. If the roots get waterlogged it can kill the plant. They need to be able to have gas exchange in their roots!

Step Two: Gather your equipment

A spoon and plate, cups (with labels and holes), extra soil, and your seedlings. The plate is just so you have a clean surface to work on.

Step Three: Fill the cups

Create a hole for the plant

Fill the cups about 3/4 full with your planting media and create a hole at least halfway through by sticking the spoon in and wiggling it back and forth so the hole stays intact when you remove the spoon. Don’t go all the way to the bottom of the cup. Leave some soil underneath for the roots to grow into.

Side Note:

Planting media. Let’s take a second to discuss what to use. When starting the seeds, many sources told me to use media that does not have nutrients in it. Too much nutrients can damage the seeds or young plants. So I used this coconut coir. It is nice and fluffy, leaving lots of room for roots to grow.

Seeding media

I used the same thing to transplant my seedlings. It worked fine and provided structure for root growth and the stems of my plants seem nice and strong. Next year I will only use this for seeding and find something else to transplant into for two reasons:

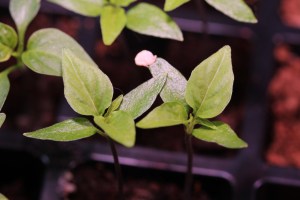
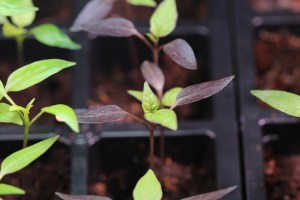
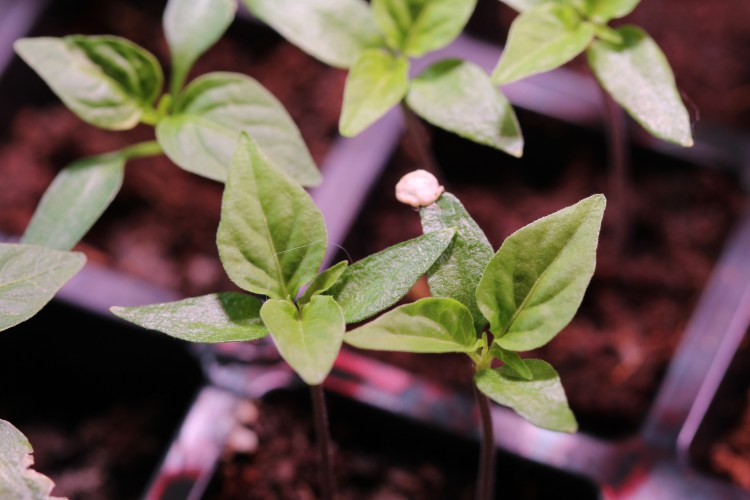
  1. Since I plant my seeds pretty early they have to get through about 2 months in this soil before I put them in the ground. I am seeing some stress in them and very slow growth. This could be due to a few different factors, but since they are getting bigger now, I think they just really need some nutrition. I tried giving them some diluted fish emulsion but I didn’t notice a lot of effect. I could look into trying a different liquid fertilizer but, I am really close to putting them in the ground now so I think I’ll just hope they hold on one more week.
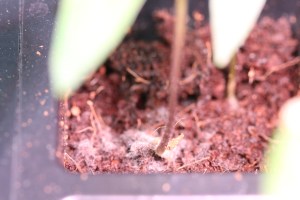
  2. I had some trouble managing my watering with the coconut coir. The top of it dries out quickly so I think I was over watering even though they seemed dry. I was only spot watering about once or twice a week, but I had some mold growing on the soil surface, which is an indication there is too much water. This media hinders my ability to decide how to water sufficiently.

I’ll do some research over the winter and pick a different transplanting media for next season. Overall, the coconut coir served it’s purpose and I do have many plants to get in the ground for this summer. Now, back to transplanting!

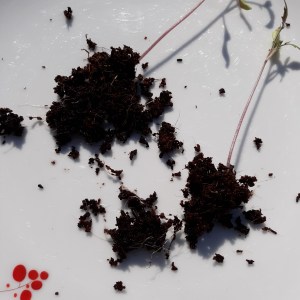
Step 4: Separate Seedlings

Lift seedling out with a spoon

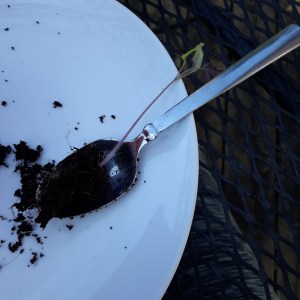
I use a spoon to get the seedling out of the tray so I don’t have to pull on any part of the plant. Just take care not to squish the roots toward the bottom.

Two seedlings with tangled roots

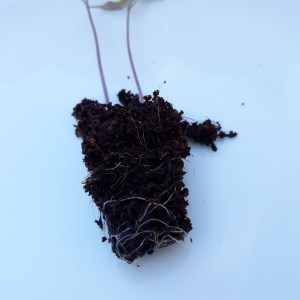
I planted two seeds in this cell, and they both grew pretty strong. Maybe if one of them was much smaller and weaker, I would just clip and plant the healthy one. But, these two should have an equal chance at life, so I want to transplant them both. Very slowly, start massaging the root area and gently pulling them apart. Some soil will crumble off. Don’t break the roots. They should be young enough to detangle once you start loosening the soil.

Separated seedlings

Step 5: Add to new soil

Place the roots of the seedling on the spoon and use it to drive the roots into the soil. Remove the spoon and fill more soil on top to completely cover the soil mass. Make sure the plant is not leaning over. It should be standing straight up. Firmly press the soil down around the stem so it has a snug fit.

Use spoon to insert seedling

Now your seedling are ready to continue growing! This new home will most likely be their last stop before being planted into the garden. Keep in mind if you used small containers, it may be necessary to transplant again if your plants grow very fast. Consider it if you have weeks left before the weather is ready and they are starting to look stressed.

Transplanted tomatoes

The Journey Begins

Thanks for joining me!

The path to knowledge is full of mistakes, but the greatest mistake is not to try.

Hello world!

I am starting to get serious about my gardening! Growing up, everyone in my family had a garden of some sort. We took pride in providing even a little for ourselves and our neighbors. Nothing creates a sense of community better than seeing the smile on someone’s face when you bring them a bucket full of red juicy tomatoes and crisp cucumbers. I hope someday in the future every yard I pass will incorporate some fruits and veggies into their landscaping. Wouldn’t that make a happy world?

My name is Emily and I am starting this new blog for two reasons:

One

I am turning 30 this year and preparing to start my own gardening techniques in new spaces. I thought this would be a good way to keep a record and help plan my garden each new year.

Two

Since I already have some gardening experience under my belt, I am hoping to be able to pay it forward and share my tips, tricks, and knowledge with the community. Gardening can be a bit overwhelming for a beginner (and sometimes for the experienced as well). But, with a little bit of patience, a dash of hope, and some solid research we will be able to grow ALL of the things together!

What should you expect?

Most of my posts will be journal-style to update everyone on how the plants are growing and record observations to look back on in coming years. To satisfy the scientist in me, I will also be adding some pages that are more research based. These could include experiments that I will work on or literature reviews on techniques.

4/5/20 Transplanting Peppers: Knowing when to plant

When you dislodge a plant form where it has been growing, it damages the tiny root hairs that are used to absorb water and nutrients. That is why they undergo some form of transplant shock when relocated. The plants could look a little wilted, or they may not take on noticeable new growth for a few days as they repair the root damage. They need some time to regrow the tissue damage and get a hold on the new soil. There are some things you can do to prevent damage, such as handling the plants carefully. Don’t be afraid of transplanting though, it will be more damaging for the roots to become root bound by growing in too small of a space.

Pot size

*Plants become root bound when they remain in too small of a pot for too long. The roots grow in circles and become knotted up. This is bad for the plant because there is generally no longer enough nutrients in the pot to feed the plant. They can either starve, or, it will become very difficult to keep the soil moist enough. This also damages the root function, not allowing proper absorption of water and nutrients properly.

Some signs that your plant may be root bound include thick roots poking out of the bottom of your pot through the drainage holes, visible bands of roots at the surface of the soil, discoloration of the leaves, wilting, and needing to water your plant (a lot) more than usual. The plant can sometimes be saved by re-potting to a bigger size immediately. You would have to break up the root ball gently so it can grow in different directions.

Besides having too small of a pot, it is also possible to have one too big. If your pot is very big for your plant, it may be difficult for the roots to reach and absorb water and nutrients. This could lead to disproportional growth with the plant lending most of its energy to getting the roots to grow deeper. Although this scenario is the lesser of two problems, it should still be avoided. Use an appropriate size pot to reduce the likelihood of future problems.

My rule of thumb: I usually try to transplant so that there is a few inches of soil underneath the tips of the roots.

Timing

There is no exact amount of time after planting a seed that it has to be moved by. It is a bit relative and you have to use your judgement. I like to go by

  1. How many leaves the plant has
  2. Observing the overall health of the plant
  3. How crowded the tray is looking

It is important to note the distinction between “first leaves” and “true leaves”.

First leaves are what people call the very first thing you see when green emerges from the soil. These are more technically called cotyledons. They are actually part of the seed and store energy from the seed. In the picture below, you can see that the seed is still attached to one of the cotyledons.

I always have an urge to pick those off, but I tend to leave them attached because they may still be providing energy to the growing seedling. They will fall off eventually on their own. As the plant grows, the whole cotyledon will fall off as well!

Pepper seedling with seed still attached to a cotyledon

Some cotyledons are photosynthetic, but at this point, the plant is surviving mostly off of stored energy and could survive on little to no light. Before it grows true leaves, it is more important to have good moisture and warm temperature, but if you do not have lights on them yet, it would be a good idea to start getting them set up! Definitely set up lights if your plants are not growing straight up. They should not be leaning over.

The true leaves are the actual new organ of the plant which is photosynthetic.

Some cotyledons look similar to the true leaves of the plant, and some look completely different. It is often more difficult to identify a plant by the cotyledons that emerge, than when they get the first set of true leaves.

To accentuate the difference, here is an heirloom seed I planted called a Jigsaw pepper. New growth starts green then turns purple! I was interested to find that the cotyledons did that as well. In the picture below, the purple “leaves” are actually the cotyledons, and the green ones are the emergence of the first set of true leaves!

Jigsaw pepper seedling

Why the botany lesson?

It is important to know the difference because that is how you know when the plants are ready to be transplanted! You can have faith that the roots are strong enough for transplanting when the first or second set of leaves have developed and the plant looks sturdy and healthy!

One more helpful tip: I planted 2 seeds in each cell of the tray and in many cells, both seeds grew. Some people thin them out by clipping (not pulling!) the weakest one, but I am going to attempt to keep as many as I can. The problem with that is some of the seeds which germinated first or grew faster are now starting to shade out the smaller ones, making them stunted. That is a another good indication that it is time to remove and re-pot.

I am transplanting about 5 weeks after planting the seeds, for some reference. All of my seedling have their first leaves, and some are growing the second set. They are all different sizes. I am going to attempt to remove the big ones, and allow the little ones a few more days to grow.

Tune into the next post for my transplanting technique!

3/29/20 Pepper Seedlings Growing

It has been 4 weeks since I started my pepper variety seedlings. They had a pretty high germination rate and are looking pretty healthy for the most part. I am just going to give a quick review on how I got them started.

Starting Trays

I bought a 72 cell seed tray. The idea for this setup is pretty cool. It has a mat that sits up on blocks and the edges dip down into a water stock in the bottom of the tray. The cells sit on top of the mat. I like it because you do not have to water the cells from the top, which can dislodge and uncover the seeds. But, I did have to do this occasionally. Some cells did not sit on the mat right to absorb enough water.

This particular tray set up came with a plug of starter soil inside each cell. The instructions were to just add water and they would absorb it and fill the cell. This did not work very well and the cells are too small to be able to easily stick my fingers in and fluff it up. I ended up dumping it out to break it up with my hands and then refilling the cells. I recommend getting a compacted soil block and trays with empty cells instead. I like to use coconut fiber starter.

Beware of using starter soil with a lot of nutrients in it. Seeds contain enough energy to get the seedling inside off to a good start on its own. If you pump too much nutrients around the seed, it could overwhelm and fry the seeds. You will likely have a low germination rate or stunted plants.

Too much of a good thing….

One year I made the mistake of using a bag that contained composted manure and hardly any of my seeds sprouted. At the time, I thought it was because I had set them out on the deck in full sun and they were too hot, but now I know it was because there was too much nutrients in my starter soil. This year I will even do my first transplant into larger pots with the coconut fiber, and slowly add nutrients in the form of a fish emulsion dilution. I’ll share more details on that when I start it.

I put the whole set up on a heat mat with some tin foil separating the mat from the counter top to insulate a little. I also started with the clear lid on all the time to create a greenhouse effect, keeping in the heat and moisture. Most of the seeds germinated in 6-9 days.

Planting

I planted two seeds in each cell. I have found that when starting seeds, it is best to plant more than you think you will need. Some seeds won’t germinate, and even after germination the plants can die off for a number of reasons, so you will likely end up with less than you planted. If you are working with limited space in your garden, you will also want multiple plants so you can pick out the healthiest looking ones to transplant.

Maintenance

Keeping the correct amount of moisture in the soil can be tricky. I try to check on the trays multiple times a day. The soil should not be too dry (dusty or really crumbly to the touch); or too wet (compacted or with visible water on the top). You do not want to water log the roots because it interferes with their exchange of gasses. Always use seed cells that have holes in them for drainage.

I started to notice some white mold growing on the soil at one point. I was pretty nervous about it at first but, after looking it up, I found that is pretty common if the soil is too wet. I left the lid off and turned on a ceiling fan and the mold decreased. I tossed out a few seedlings that were really covered in it, but it seems like it is not too damaging to the seedlings, especially when they are bigger.

Example of white mold
Light

At this point, I did not use any lights on the tray. When the seedlings got big enough that I was finding it difficult to put the lid back on the tray, I moved it off the heat mat and set grow lights on it.

Grow lights on germinates seedlings

If the seedlings start leaning toward another light source in the room like these cabbages are doing in the photo below, that is a good indication it is time to add a top light source as well.

Looking for light

It is good for the seedlings to stay on the heat mat but, I only have one right now and my set up is in the living room so the room temperature is warm enough to support growth. I moved them to another table so I could start the tomatoes!

Germinating seeds

The last step in germinating seedlings it to wait! It can be difficult not to fuss over them with all your anticipation, but at this point, it is best to just let them do their thing!